Custom Web Panels
Here you can learn about how to create, enable, edit, delete and display Custom Web Panels within your AnswerHub instance.
Overview of Custom Web Panels
AnswerHub now provides multiple Custom Web Panel types:
- Custom Panel - Provides an open code container that can contain HTML, CSS, and Javascript to allow you to embed / iframe other resources or create unique visual treatments or functions.
- Featured Highlights Panel - Provides an easy to use templated web panel consisting of 1 to 3 sub-panels, each with its own title, description, image and clickable link. Use this panel type to promote content within the community or to highlight events or other attractions elsewhere.
- Resource Links Panel - Provides the ability to present a title and up to 10 displayed links and associated URLs. Use this panel as a navigational aid on spaces and topic pages to provide contextual links to resources elsewhere on your domain that relate to the space or topic such as documentation, support resources, SDKs, Parts, Services, etc.
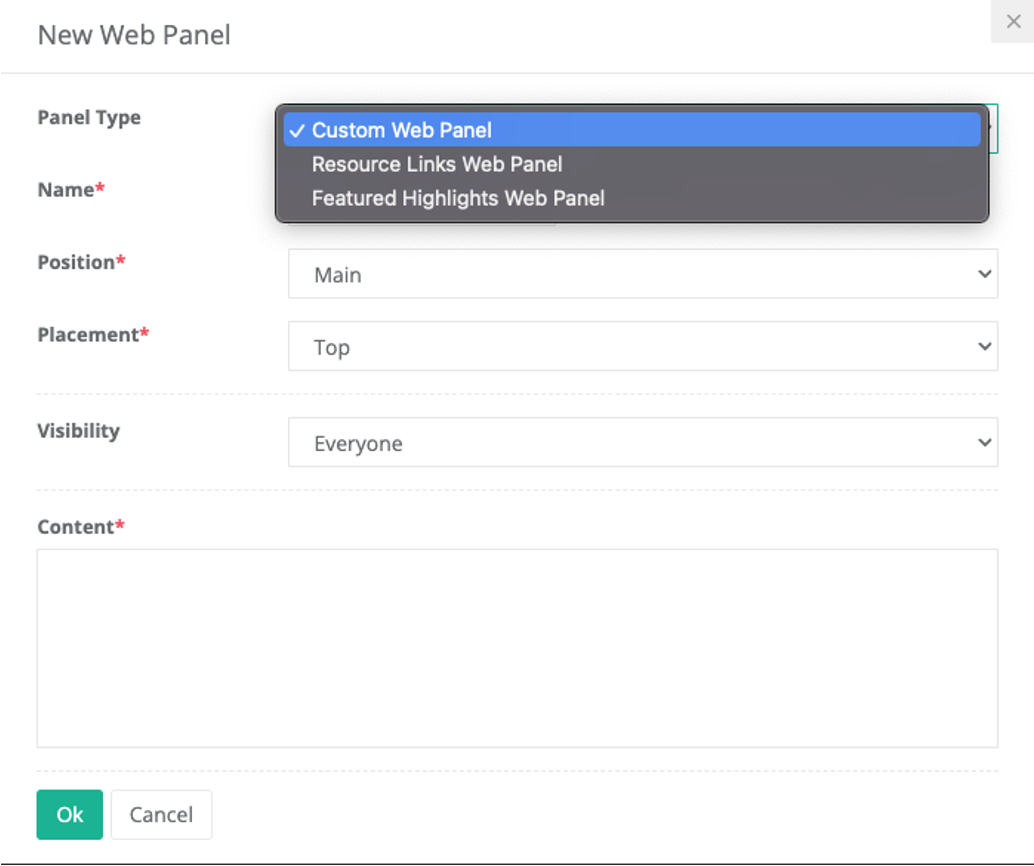
Custom Panel Type
Custom Web Panels are a good way to add announcements, Twitter feeds, interactive spaces, advertisements, and just about anything else to customize your AnswerHub community.
The Admin can create, edit, delete, enable and display custom web panels from their admin dashboard.
Admin Dashboard Access
Accessing Custom Web Panels in the admin dashboard:
- Navigate to Site > Custom Configurations > Custom Web Panels.
- Here you will create and enable your Custom Web Panels to be in either the main section of your page or in the right sidebar.
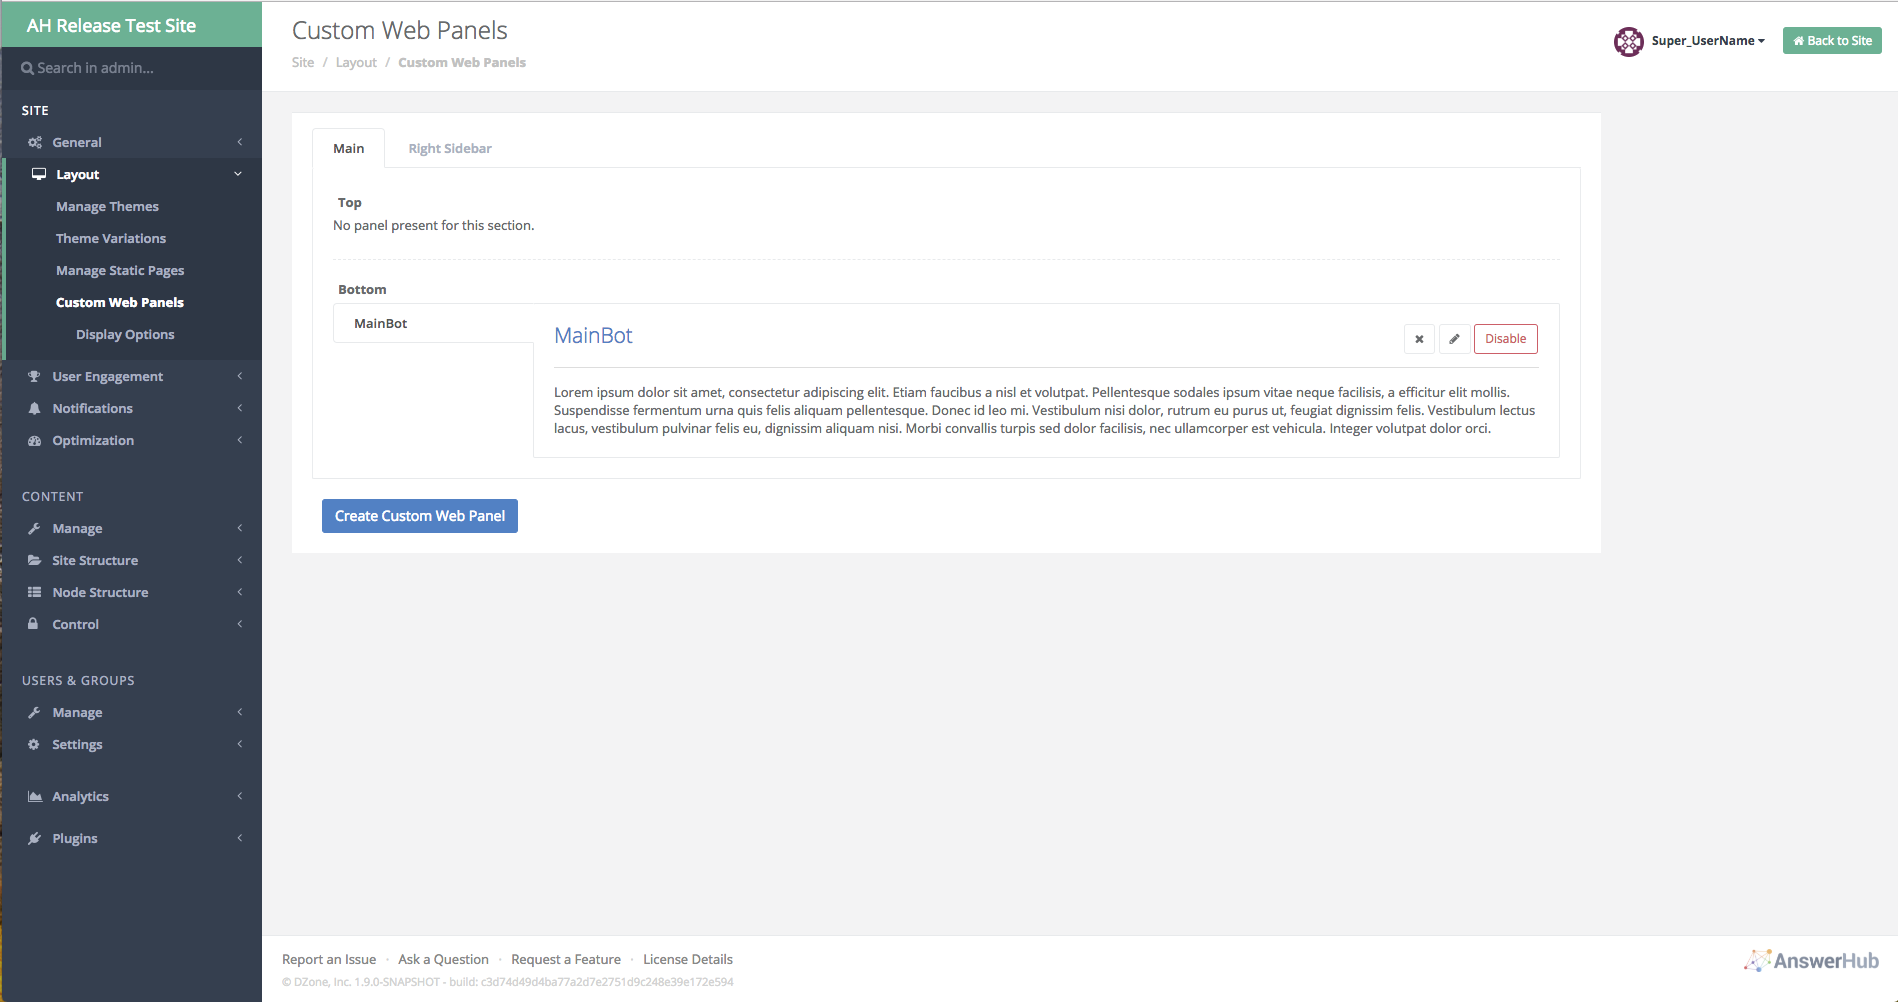
Main Section Tab Selected with an Enabled Custom Web Panel
First, Click the Create Custom Web Panel Button
Next, select the panel type - Custom Web Panel
Fill in a name for the panel - this is the name of the panel that you will search for when it comes time to display your panel.
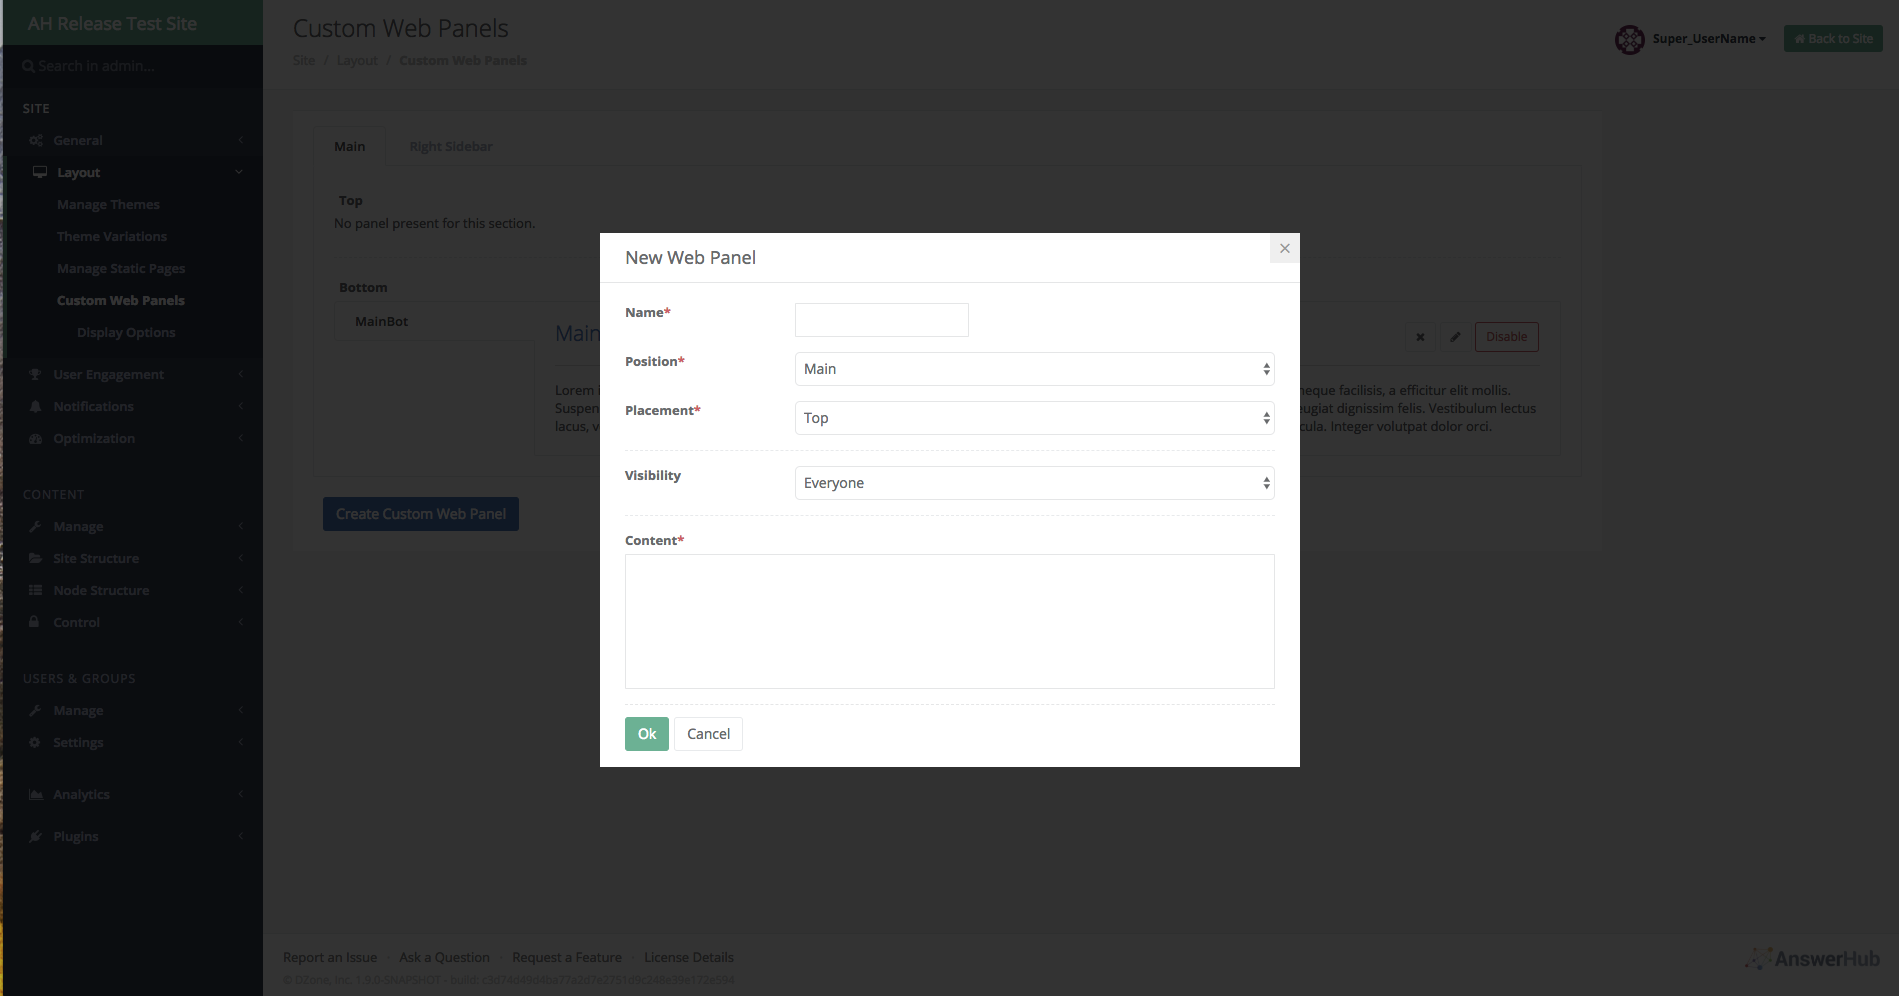
Select Position and Placement Options - Main/Top will appear above the content list feed while Main/Bottom will appear below the list of content on the page. Similarly, Right / Top will appear above other widgets in the right column, while Right / Bottom will appear below the other widgets.
Set visibility - Normally set to everyone, but in cases where the community is public, it is possible to select panels that would only be visible to anonymous users (such as a promotion to encourage new users to join the community) or only to those logged in (such as notices about upcoming events or options for community members.
Content - add your HTML / CSS / Javascript
Click OK to save the panel
Be sure to click the "Enable" button for your panel. If the panel is not enabled, it will not display on pages selected for it in the display options section.
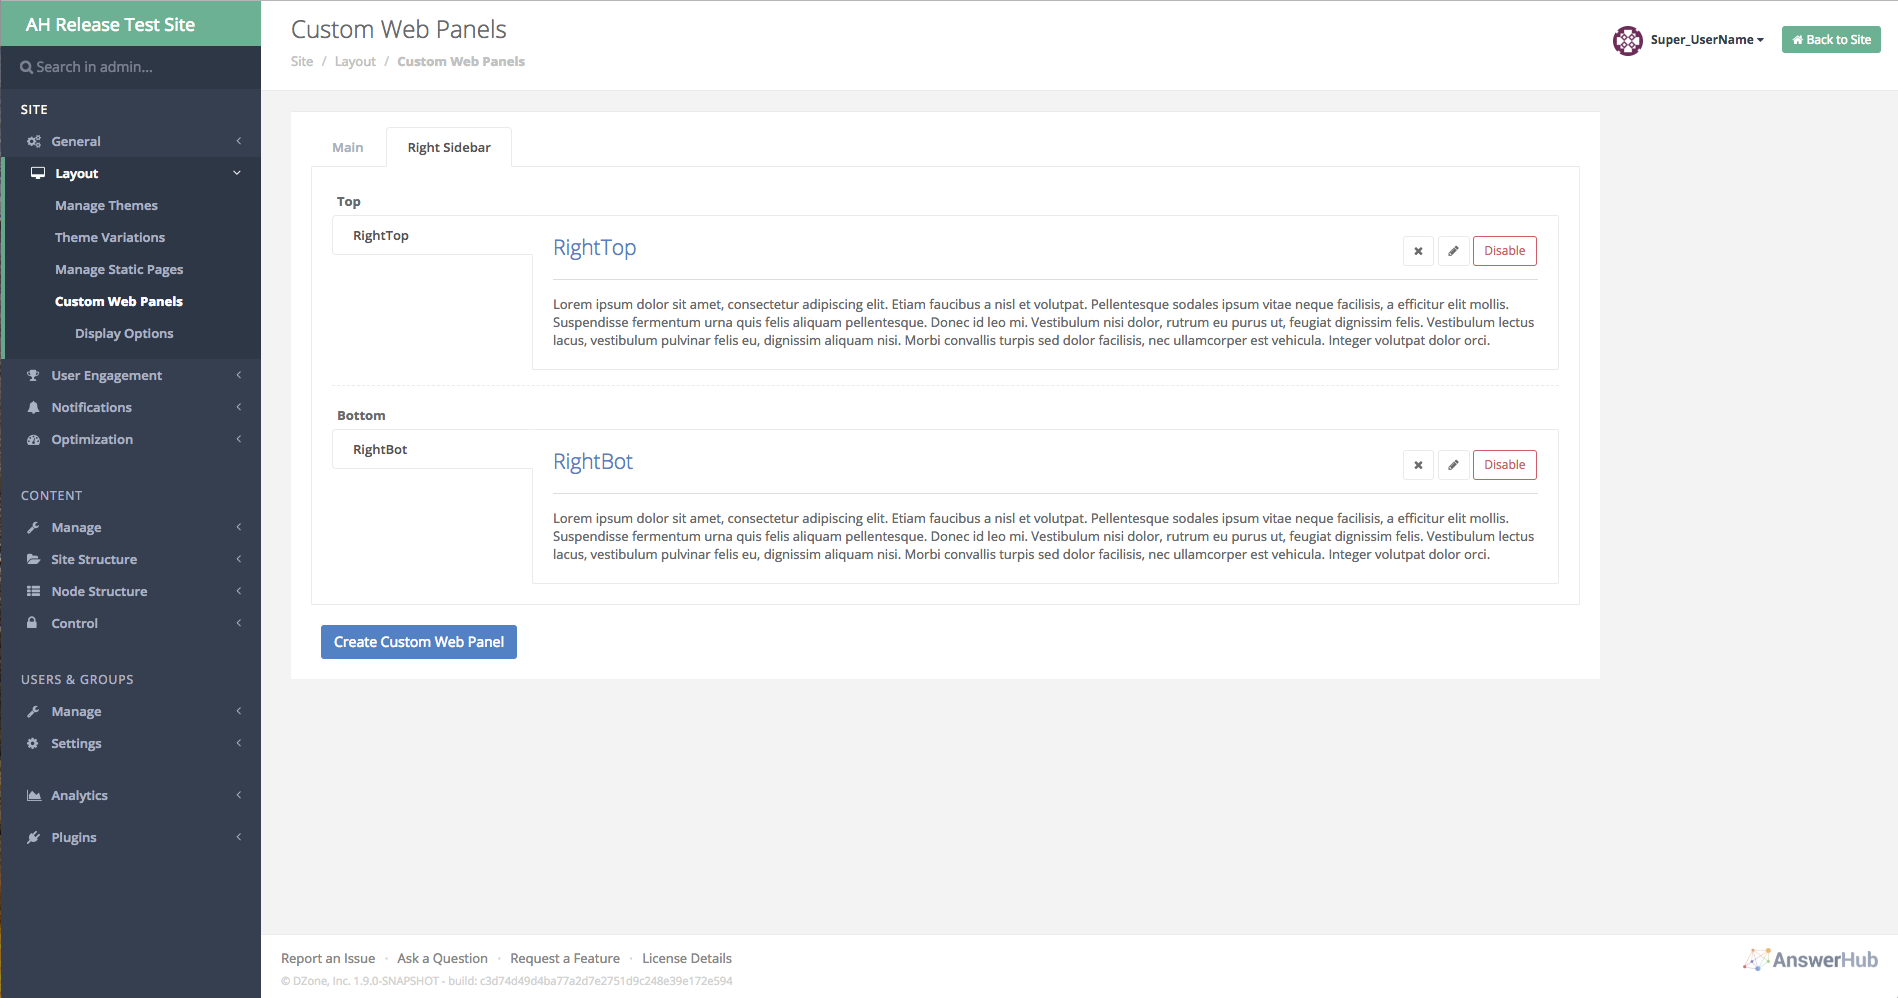
Right Sidebar Tab Selected with Two Enabled Custom Web Panels
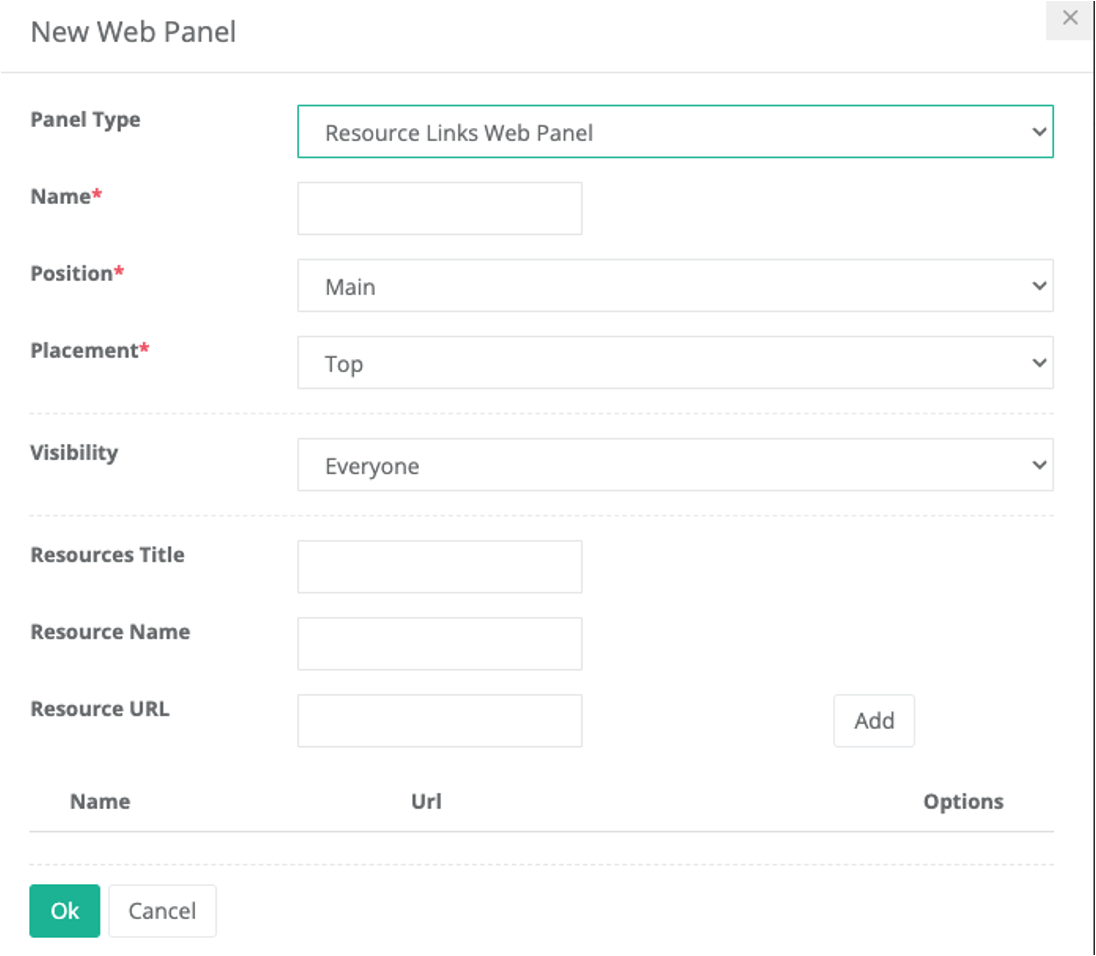
Resource Links Web Panel
Click Create Custom Web Panel Button
Select Resource Links Web Panel from the Panel Type drop down menu
Select Position and Placement Options - Main/Top will appear above the content list feed while Main/Bottom will appear below the list of content on the page. Similarly, Right / Top will appear above other widgets in the right column, while Right / Bottom will appear below the other widgets.
Set visibility - Normally set to everyone, but in cases where the community is public, it is possible to select panels that would only be visible to anonymous users (such as a promotion to encourage new users to join the community) or only to those logged in (such as notices about upcoming events or options for community members.
Resources Title - Enter the public display name for the panel. This should inform the community of the purpose of the included links.
Enter a Resource Name and URL. The name will be the displayed name of the link and the URL will be the destination when the link is clicked. This can be a URL outside of the AnswerHub community.
Click ADD to record this to the panel.
Up to 10 Links may be added to the panel, and once added, the order made be arranged through dragging and dropping an entry above or below others. If a link needs to be replaced or updated, simply click the trashcan icon next to it to delete it and add the new link name and URL to replace it, add, then drag and drop to place in the desired order.
Click OK when finished, and then select your web panel and click the enable button to ensure it is active before moving to the display Options Page to select where to display the new panel.
Featured Highlights Web Panel
Click Create Custom Web Panel Button
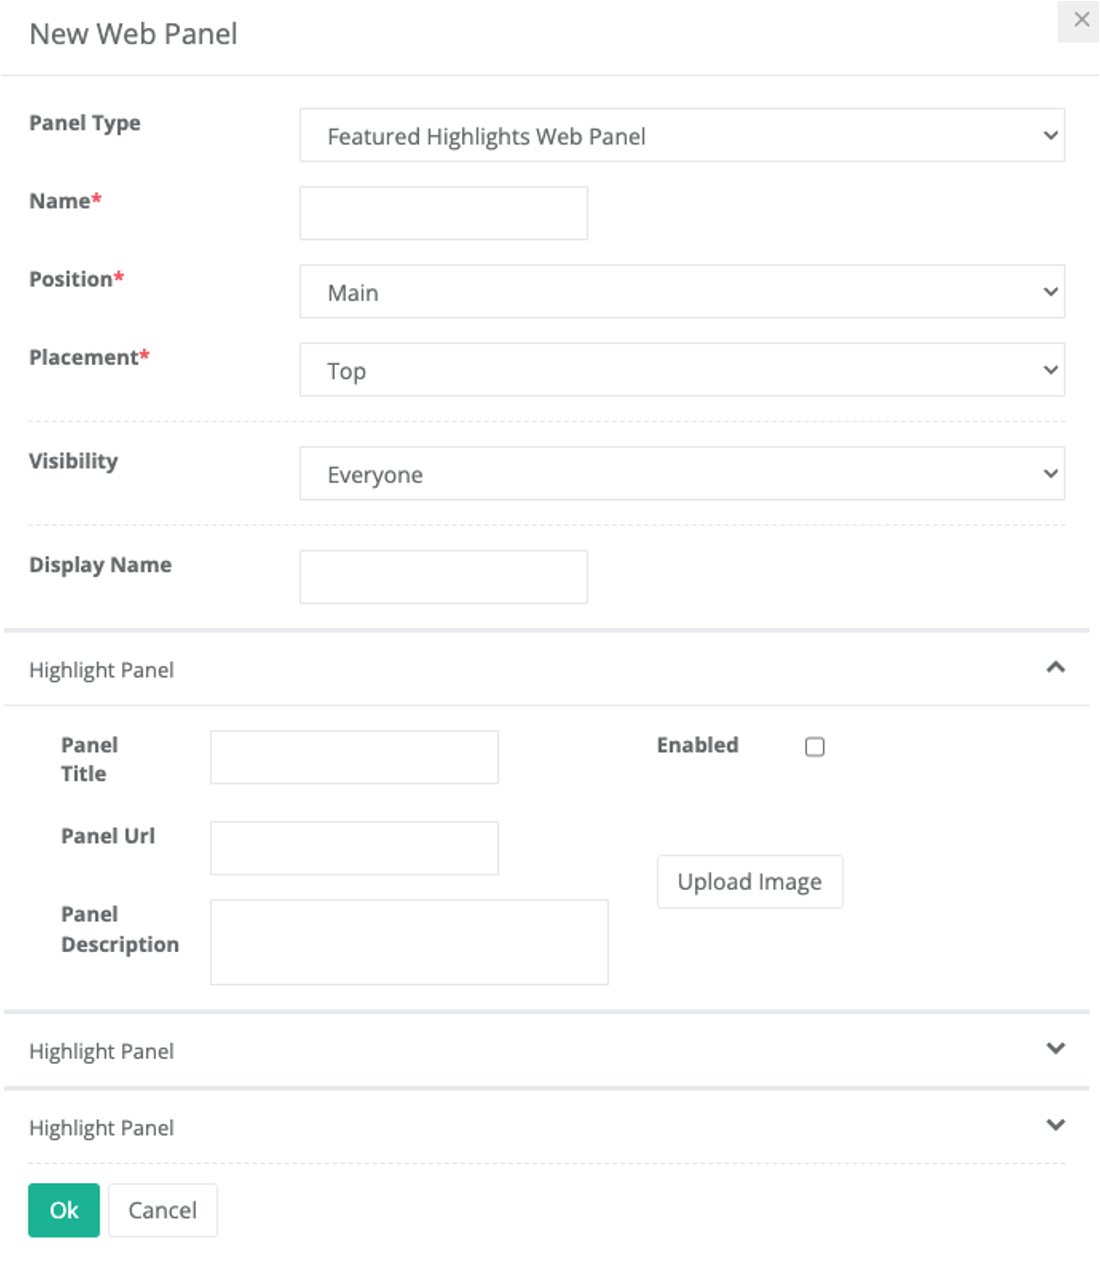
Select Featured Highlights Web Panel from the Panel Type drop down menu
Select Position and Placement Options - Main/Top will appear above the content list feed while Main/Bottom will appear below the list of content on the page. Similarly, Right / Top will appear above other widgets in the right column, while Right / Bottom will appear below the other widgets.
Set visibility - Normally set to everyone, but in cases where the community is public, it is possible to select panels that would only be visible to anonymous users (such as a promotion to encourage new users to join the community) or only to those logged in (such as notices about upcoming events or options for community members.
Display Name - Enter the public display name for the panel.
There are 3 sub panels, and each may be edited and activated by clicking the chevron to expand its sections
The Panel Title will be the clickable title of the sub-panel
The Panel URL will be the destination when the title link is clicked. This can be a link outside AnswersHub.
The Panel Description is a short description of the featured content, event, or resource
Upload Image - Click the upload image button, select and accept an image from your PC.
Each of the 3 sub-panels may be selected for display by clicking the Enable box for that panel. Combinations of 1,2, or 3 subpanels are possible.
The Panels may be re-ordered in display sequence by drop and dragging the "Highlight Panel" above or below the next panel. Panels placed in the "Main" location will be displayed left to right in the UI. Panels placed in the "Right" location will be ordered top to bottom in the UI.
Click OK when finished, and then select your web panel and click the enable button to ensure it is active before moving to the display Options Page to select where to display the new panel
Updated over 1 year ago
